Thursday, June 5, 2008

Configuring Search Server 2008

Now lets focus on the configuration of search server so that it may help you pull out results for you. Now we have search server installed (I am continuing this from my post at http://alliknw.blogspot.com/2008/06/search-server-2008.html )
then if you have to locate where can you find the program to initiate it, its located at Start > All programs > Microsoft Search Server > Microsoft Search Server Administration.
When you click on that you will notice that it launches the Search server administration page, also if you notice the Central administration page of WSS in my case I see a Shared services link which is again The Search server Administration Page


So you have a search configuration page which has a lot of things and we gonna have a look at them one by one. Now the first thing I noticed that the search server administration web site was made on he the application that hosts Central Admin and also when you login to the Central Administration page and Click on Shared services one you get the Search Administration page which has url like servername/ssp/_layouts/SearchAdministration.aspx. and now if on being Search Administration page you click on Home Tab It takes you to SSP home which has 4 options


1> Search Administration
2> Search Settings
3> Search usage reports
4> Usage analysis


>> Getting back to our administration page you have lot of links and web parts that are configured to different sections of the page


>>The left pane which is like a Quick launch bar contains links to administration pages of Search Administration and Central Administration


>>Second section is Crawling which also does have some 8 links to help us make crawling easier and simple they are:

1. Content Sources: They help you determine the sites that are included in the crawl, create crawl schedules and also perform crawl settings, also you can initiate a full or incremental crawl . You can add new Content sources which will have an include Sharepoint site, websites, File share folders, Exchange public folders


2. Crawl Rules : By default there is no Rule, but you can add a rule for a path suppose http://teamsite and then you can choose to exclude items in url or say include complex url (e.g. url with ?) and specify a content access account , use a client certificate, specify credentials o use cookies for crawling.


3. Crawl Log: Shows the number of crawls, url included in crawl and successes, warnings and errors with failure message for troubleshooting


4. Default content access account : which shows the account that you use to crawl the contains you can also change the account but you would have to perform a full crawl to get results
5. Manage File Types : is used to mange the file types which can be crawled it includes 38 types by default and you can add some more


6. Reset Crawled Content : This feature will reset the crawled content indexes and search will not work until you run a full crawl again which will again index all the files to search database


7. Crawler Impact Rule: This will help you control the file sharing or requesting between number of users you can mention a url and set property as number of users that can simultaneously request and get the same document those can be 1, 2, 4, 8 , 16, 32, 64, or you can limit the request to one at a time


8. Farm-Level Search Settings : here you can specify and change administrators email address to contact to incase of a problem, You can specify a proxy server and configure its settings, Timeout settings will be amount of time the server will wait when connecting to other services and whether to use or ignore SSL certificate warnings.


Then there is another section Queries and Results which includes:


  1. Authoritive Pages: Here you can promote and demote your links and results suppose you want site A to show results first as compared to site B for a keyword you can set site A as most authoritive page and Site B as least authoritive page so what ever you search you will get more results froms Site A.

  2. Federated Locations : I will talk about this later when we cover federation

  3. Metadata Property : Crawled properties are automatically extracted from crawled content. Users can perform queries over managed properties. Use this option to create and modify managed properties and map crawled properties to managed properties. Changes to properties will take effect after the next full crawl.

  4. Server Name Mapping : Specify the address at which the content will be crawled and the address that will be displayed in search results.

  5. Search result Removal: will remove the specified urls from occuring in the results of the search

Usage Reports :


  1. Queries Report : This part shows the reports for the queries that are searched by useres it also shows a pie diagram for the sites contibution in gentrating the request

  2. Results Report : Results report shows reports for quesries with zero results and best bets configured, with zero best bets

Webparts:


Active Crawls:
This web part shows the number of calls running actively, duration it has been running and nature of crawl full or incremental.
Recently completed crawls: this web part shows the completed crawls, type, duration, successes and errors.
System status : It shows the system status which includes crawl status either running or Idle, Items in index, Server status which is normally the indexing server, propagation status, Default content access account, Contact e-mail, Proxy server none, Scopes update status, Scopes update schedule, Scopes needing update, Search alerts status, Query logging
Shortcuts: Which is actually links web parts used for navigation
I want to : This web part helps you provide links that can be like a FAQ to help people configure search clicking on the link take you to help search

Wednesday, June 4, 2008

Search Server 2008

Lets start with the concept of search, Search is one of the most growing business today on enterprise industry it helps us to get hold of our documents and important folders and files instantly, you don't have to waste your time locating it,
We can use the search items from Windows Desktop Search to Google desktop Search, which will index documents on your PC and when you put in the key words, and ha here is your file.
Then we have Google One box which can be used for many reasons to derive results out of your intranet site. So to compare to it we have Microsoft search server 2008 now what this search server helps you derive results from your intranet site as well as internet applications.
Now to know a detailed explanation about What search server is and all other information please refer to http://www.microsoft.com/enterprisesearch/
It is available as a free download with SQL express edition and a Full version which has to be installed and configured with Full SQL.

Now as I begin to install Search server 2008, I noticed that,
• It does not support AD creation mode, so if you have a AD creation mode the setup wont proceed and you would have to drop the config database and re-create one with AD again.

• I am installing full search server on my WSS 3.0 Machine now when you notice the splash screen that pops up when you inseart the CD, it has many options
1> Search Server Preparation Tool : now this is a super cool feature as it helps you to determine and check if the prerequisites are available and installed on your system or not, if they are not the search server begins installing them automatically, these include windows server 2003 SP1, Windows Workflow foundations included in .net 3.0 and .net frame work 2.0, IIS and ASP.net and web server extensions, hence its called a Search server preparation tool, once you run this wizard it shows the time it started and time elapsed, it completed successfully for me within 2 minutes, also if you open the installer CD you will notice two .exe files out of that one is PreRequisiteInstaller.exe, which is initiated when you run the Preparation tool


2> Install Search Server 2008: This one will start installing Search server 2008, also it will ask you 3 options (as in sharepoint) Complete, Web Front End or Standalone, I took Complete, it gets installed in two parts, one is installation of search server and other is Applying updates. after the installation it will ask you to run technologies and configuration wizard as we have a Express edition of search server installed the databases for search will be made on the SSEE .
So when you run the wizard it will again take you to 9 steps of configuration


Step 1 : Initiating Sharepoint product and Technologies wizard
Step 2 : Initiating upgrade sequence
Step 3 : Installing Help collections
Step 4 : Securing sharepoint resources
Step 5 : Registering sharepoint services
Step 6 : Registering features
Step 7 : Registering application content files
Step 8 : Upgrading Products and Technologies wizard
Step 9 : Finalizing The upgrade
Out of these I noticed that Step 2 and Step 8 took a lot of time but in the end it was successful. After you finish this wizard .
It will launch the Central admin page with search server configuration page. There you need to fill the required section which will ask you for the indexer and default content access account, Search center account. After you fill in these and hit on start it will perform the following operations.


Starting search service
Starting help service
Creating Shared services provider
Creating web application for search center
Creating search center site
Then it gives you a page saying its complete click on OK and your ready to go
This is how you install the search server 2008, I will show you how to configure it on my future posts.
Do remember to leave me comments

Wednesday, May 21, 2008

Branding sharepoint site III

Making your own content type
In this we will learn to make our own content type and publish it

To look at your Content types in the site browse to site actions > site settings > Content Types

There you will get a list of all content types

Click on create

Type name and desctiption and choose parent type as publishing

and you can choose to add it to new or existing group

I have choosen Name as Hobbies and Parent content type as Publishing Content type

Then you can add some columns from the content type page like i have added a yes no checkbox and a HTML summary page

and a existing columb as job description


Now open your sharepoint Designer

Open your site from file > open and site name

then open the _catalog folder
Then open folder master page and click on page layout
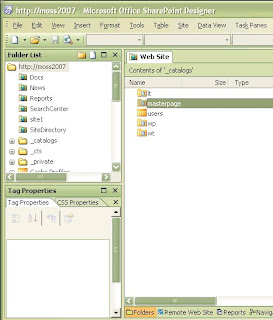

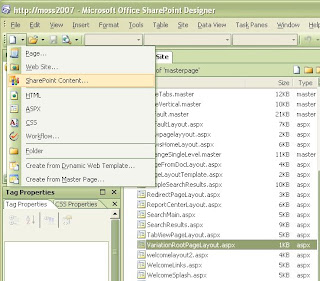
after that go to new and sharepoint content type

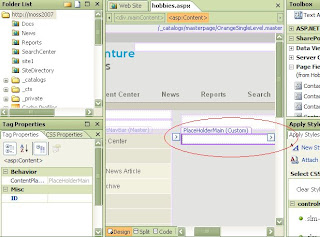
after it is listed in the list of content types, double click the content type and open it in design mode
There you will see the place holder part
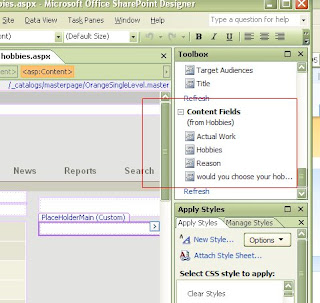
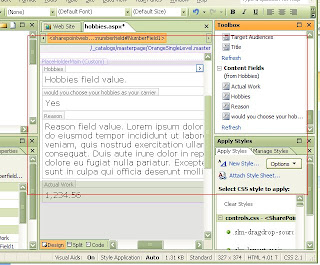
Go to the tool box situated at the right upper of the page and drap drop the columbs


then you will see something like this

Save this page check in the ocument and you are done, you have sucessfully made your own content type,
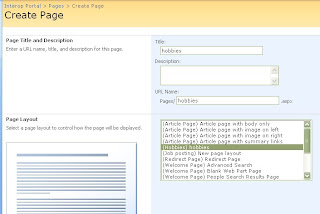
Wanna check that out ok,

Go to the main page of your site


site actions > site settings and Create Page
You see your creation listed there

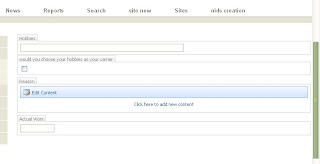
create a page using it and tadaaaaaaaaaa here is your own page

Tuesday, May 20, 2008

Branding sharepoint site Part II

How many times have I wondered when I see 'Internal & Restricted' written on every page or site or Copyright Label on Bottom of sharepoint sites being stamped on everypage that we browse. well that is actully the fundas of WCM . I will post a topic on Content Management and intergration of CMS 2002 intergration with MOSS in my later Posts
back to where I was I experimented on how and where to add the Copyrigth label and implement it on all other sites and yepheeee it worked for me with some limitaions which i will list down.

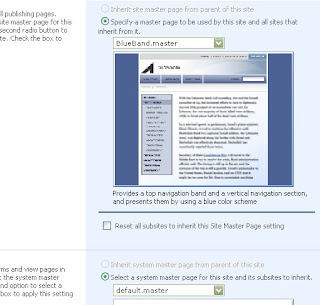
To start of with we need to know what a master page is all about in sharepoint and where do you find it A master page determines the loook and feel of your site and it also determines the navigation controls that useres use. Now suppose you have a blsnk site collection and your want to change the master page of the site go to Site actions > site settings > click on Master Page under look and feel
There the option will be default change it to anyone you like I will take example of Blue Band master page

Select the page and check on check box that says inheriting to subsites. Now your page is changed to a brand new master page
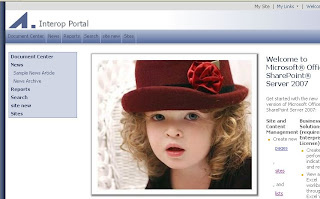
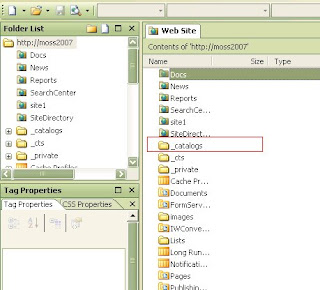
Now after this you have to open this site in sharepoint designer Then Open the Site in Designer and open folder called _catalogs folder and double click the Master page folder.

There Double click on the Blue Band master folder. And open the folder now all you have to do is add this chunk of code

So it starts showing on the page but how do we implement it on all the pages

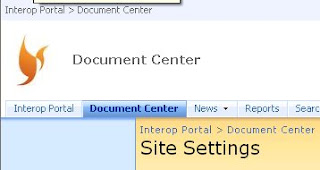
After this is done we will switch to Apply styles on the bottom right corner and select topNavitem so that this implies to all the pages where topNavItem is used and here is how it looks

Limitations are that I didnot find it being implemented on the new page that i created even after changing it to master page
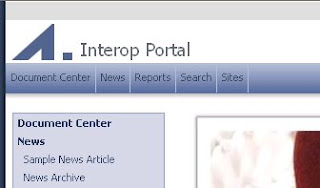
Also it was comimg haywire on some pages and i had to adjust the table. Please do leave me comments and let me know if there is anything that I need to add here


Branding the sharepoint site Part I

Alright, I have come across a very new and good feature of MOSS, Its called Branding the site now what do you actually mean by branding the site its to have a label or logo of the company other that using Microsoft Features, also to set up a theme that complies to your product like L'oreal and other companies who will alwayz use there own specific logo.
Now Changing the logo of the site is fairly simple you just need to upload the image to any document library and copy the link
like the default logo of the site is :


Then you upload a new Image file to the Document Library, click on it and take the full url and browse to Site Actions > Site settings > Title Description Icon and settings and Specify the url at the Logo url and Description icon, Click on OK and your done the site starts showing your logo


Tadaaaaaaa it changes every where in site but remember it will not apply across web applications and will not be inherited to new subsites that you create you will have to perform the same operation again